Running Coral on Windows Using WSL: The Developer’s Way
A step-by-step guide to setting up Coral inside Ubuntu WSL so it works exactly like Linux, and calling it from your Windows apps

Before You Start: There’s a Hackathon Going On
Pirates of the Coral-bean is a live $10,000+ hackathon running May 25–31, 2026 where developers build AI agents using Coral. If you haven’t registered yet, do it now — it’s free and there’s still time. This guide will get your Windows machine ready to participate.

There’s already a great guide out there showing how to build Coral natively on Windows using MSVC and Rust. That approach works and produces a real coral.exe binary.
This guide takes a different path entirely.
If you already have WSL with Ubuntu installed (and most developers do), running Coral inside that environment is faster to set up, keeps your Windows system clean, and gives you a fully Linux-compatible Coral that behaves identically to what you’d get on a Mac or a cloud machine.
No MSVC. No Visual Studio installer. No 8GB download.
The one trick most people miss: you can call your WSL Coral from any Windows app (Python, Node, PowerShell) using a single wsl -e command. That's what makes this approach genuinely useful, not just a workaround.
What You Need Before Starting
- Windows 10 (version 2004+) or Windows 11
- WSL2 with Ubuntu installed
- A terminal (Windows Terminal recommended)
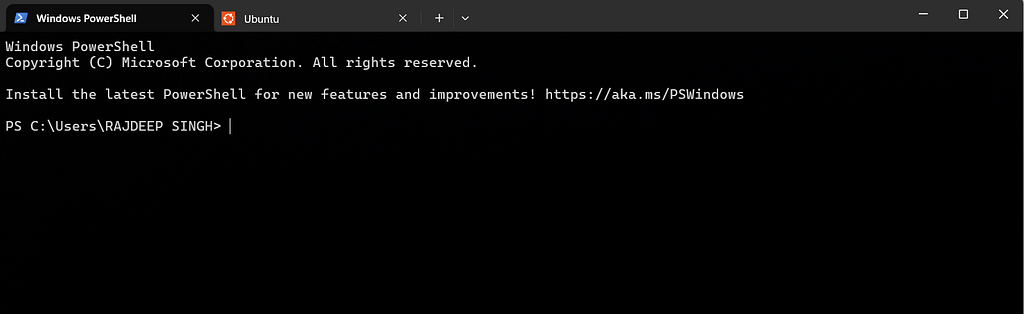
If you don’t have WSL yet, open PowerShell as Administrator and run:
wsl --install
Restart when prompted. That installs WSL2 with Ubuntu automatically.
Step 1: Open Your Ubuntu Terminal
In Windows Terminal, click the dropdown next to the + button and select Ubuntu. Everything from this point happens inside Ubuntu unless I say otherwise.
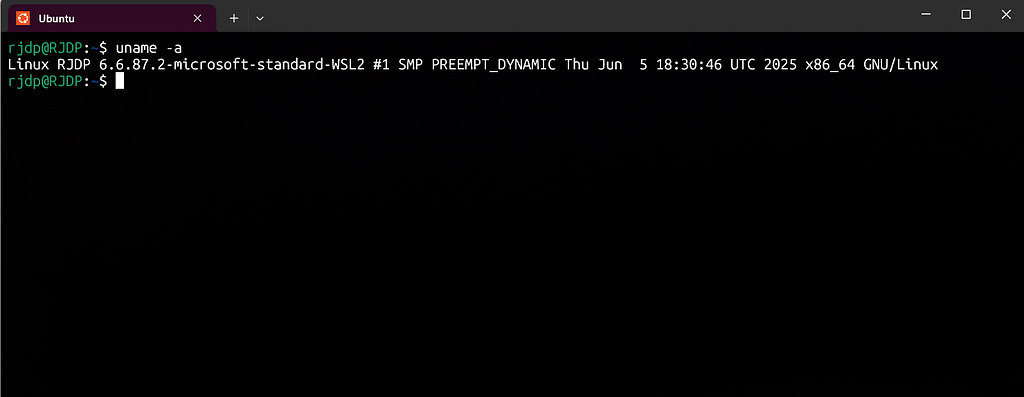
Verify you’re in WSL:
uname -
# Should show: Linux ... Microsoft ... WSL2
Step 2: Install Coral
Coral’s install script works directly in Ubuntu WSL:
curl -fsSL https://withcoral.com/install.sh | sh
This downloads and installs the latest Coral binary to ~/.local/bin/coral.
After it finishes, add it to your PATH if it isn’t already:
echo 'export PATH="$HOME/.local/bin:$PATH"' >> ~/.bashrc
source ~/.bashrc
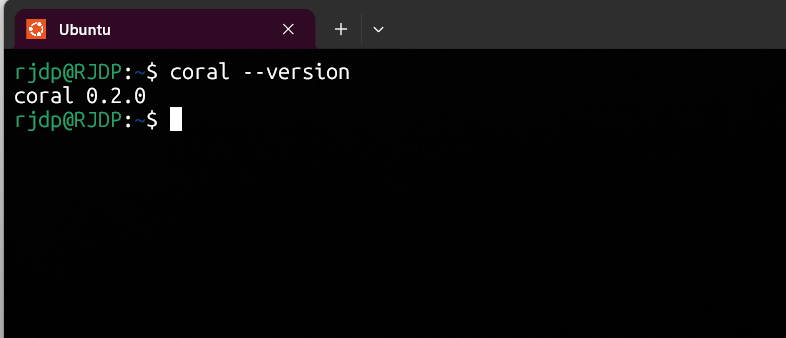
Verify it works:
coral --version
Step 3: Set Up an Isolated Config Directory
This is the step most guides skip. By default Coral stores all your sources and credentials in ~/.config/coral. That's fine for regular use but messy for hackathon experiments — you don't want test sources mixing with your real ones.
Create a dedicated config folder for your project:
mkdir -p ~/coral-hackathon
export CORAL_CONFIG_DIR=~/coral-hackathon
To make this permanent for your session, add it to your shell config:
echo 'export CORAL_CONFIG_DIR=~/coral-hackathon' >> ~/.bashrc
source ~/.bashrc
Now every coral command uses this isolated directory. You can wipe it and start clean anytime without touching anything else on your machine.
Step 4: Connect Your First Source
Let’s verify the full setup with GitHub (it only needs a personal access token):
coral source add --interactive github
Coral will prompt you for your GitHub token. Get one from GitHub Settings > Developer Settings > Personal Access Tokens with repo and read:org scopes.
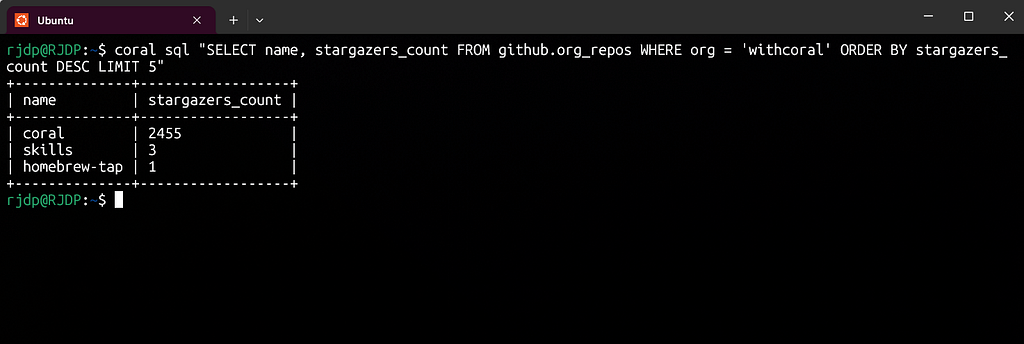
After adding it, run a test query:
coral sql "SELECT name, stargazers_count FROM github.org_repos WHERE org = 'withcoral' ORDER BY stargazers_count DESC LIMIT 5"
Step 5: The Key Trick — Calling WSL Coral from Windows
This is what makes the WSL approach genuinely powerful. You can call your WSL Coral from any Windows application using this pattern:
wsl -d Ubuntu -e env CORAL_CONFIG_DIR=/home/YOUR_USERNAME/coral-hackathon /home/YOUR_USERNAME/.local/bin/coral sql "SELECT 1"
Replace YOUR_USERNAME with your actual Ubuntu username (run whoami in Ubuntu to check).
Test it from PowerShell on the Windows side:
wsl -d Ubuntu -e env CORAL_CONFIG_DIR=/home/rajdeep/coral-hackathon /home/rajdeep/.local/bin/coral --version
If that prints the version number, your Windows apps can now talk to Coral.
Step 6: Wire It Into Your Python App
If you’re building a Python agent (like the Compass or Helm projects from this hackathon), use the CORAL_BIN environment variable to tell your app how to reach Coral:
Create a .env file in your project:
CORAL_BIN=wsl -d Ubuntu -e env CORAL_CONFIG_DIR=/home/YOUR_USERNAME/coral-hackathon /home/YOUR_USERNAME/.local/bin/coral
Then in your Python code:
import subprocess, json, os, shlex
coral_bin = shlex.split(os.getenv("CORAL_BIN", "coral"))def run_coral_query(sql: str) -> list[dict]:
result = subprocess.run(
coral_bin + ["sql", "--format", "json", sql],
capture_output=True, text=True, timeout=60
)
return json.loads(result.stdout)
# Works exactly the same as if Coral were natively on Windows
rows = run_coral_query("SELECT name FROM github.org_repos WHERE org = 'withcoral' LIMIT 3")
print(rows)
The shlex.split handles the multi-word wsl -d Ubuntu -e env ... command correctly. The rest of your code doesn't know or care that Coral lives inside WSL.
Common Issues
coral: command not found in Ubuntu Run source ~/.bashrc and try again. If it still fails, check that ~/.local/bin/coral exists: ls ~/.local/bin/coral
wsl: command not found from PowerShell WSL isn't in your PATH. Run where wsl in PowerShell. If it returns nothing, WSL isn't installed or not registered in PATH. Reinstall with wsl --install from an admin PowerShell.
Wrong config directory (sources installed in one place, not found in another) This almost always means CORAL_CONFIG_DIR is set in Ubuntu but not in the wsl -e command. The env CORAL_CONFIG_DIR=... part of the command is not optional — it must be there every time you call Coral from Windows.
File path issues (can’t reach Windows files from Coral) Windows drives are mounted inside WSL at /mnt/c/, /mnt/d/, etc. A Windows path like D:\coral\manifest.yaml becomes /mnt/d/coral/manifest.yaml inside WSL.
Why This Approach Over Native Windows
The native Windows build gives you a real coral.exe which is clean and doesn't require WSL at all. If you don't have WSL, go that route.
But if you’re already in the WSL world, the Linux Coral:
- Installs in under a minute via the install script (no 8GB Visual Studio download)
- Has the exact same behavior as Mac/Linux (no path translation issues)
- Lets you use apt or brew for any dependencies
- Works with your existing Linux dotfiles and tooling
Both approaches end up at the same place: a working coral sql command. Pick whichever fits your existing setup.
What’s Next
Once Coral is running, the next thing most people get stuck on is authentication for Google APIs. If you want to connect Gmail or Google Calendar as Coral sources, the OAuth setup is its own adventure. I wrote a separate guide specifically for that: The Right Way to Set Up Google OAuth for Coral (link coming once published).
For the full list of sources Coral supports out of the box, check the bundled sources reference.
For questions, the Coral Discord is active and the maintainers actually respond.
Written as part of the Pirates of the Coral-bean hackathon. The setup described here is what I use for building the agents on Windows.